How to use the characters relations map
Characters and their goals are usually the heart of our stories. But the core drama comes from the character’s connections and relationships with the outside world and others. Story Architect has a handy tool for building those connections – the relationship map.
If you don't already have the Story Architect app or downloaded it a second ago, read the instructions on how to install it, as well as how to log in to your personal account.
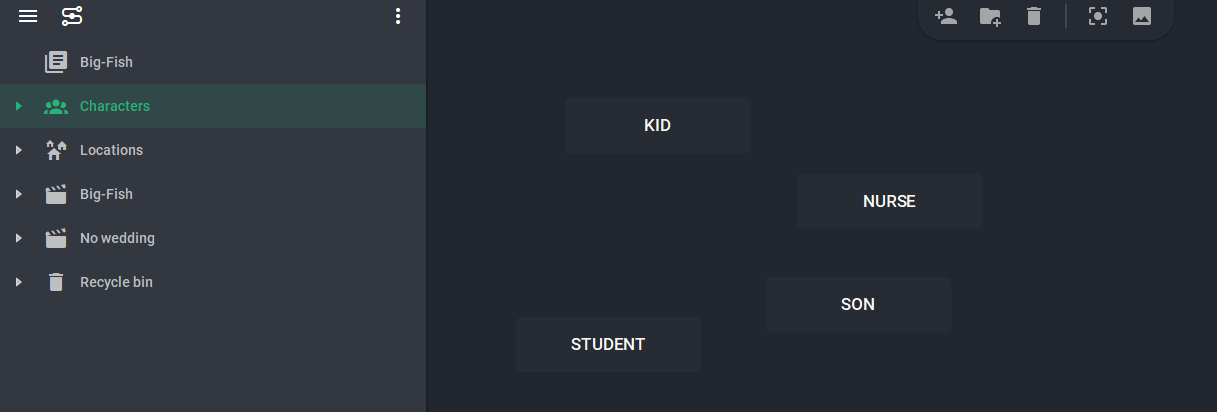
The relationship map is available in projects of any type and becomes visible after you add your first character. To open it, go to your project and select the "Characters" section in the left menu.
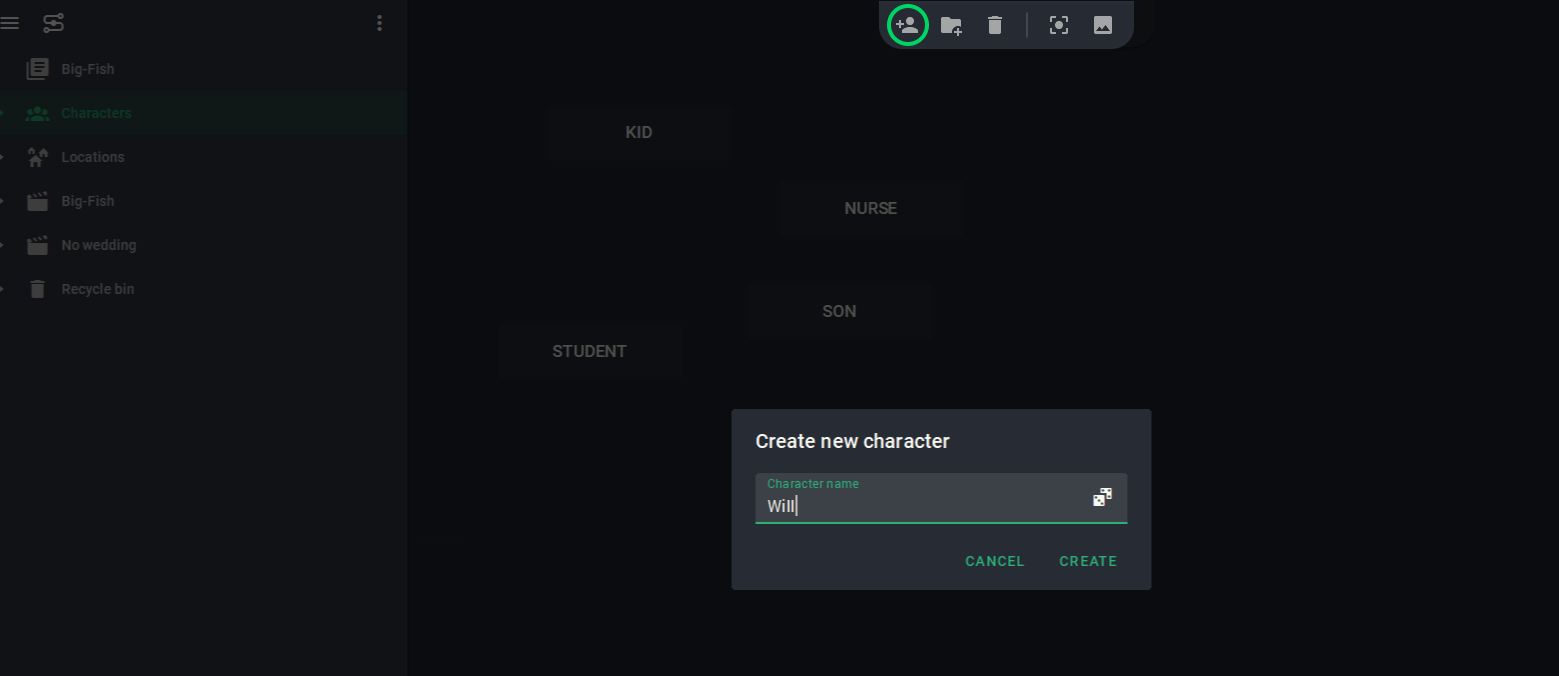
If you need to add new characters, click on the first icon in the top bar and enter a name. You can use the name generator by clicking on the dice at the end of the line. Read more about this feature here.
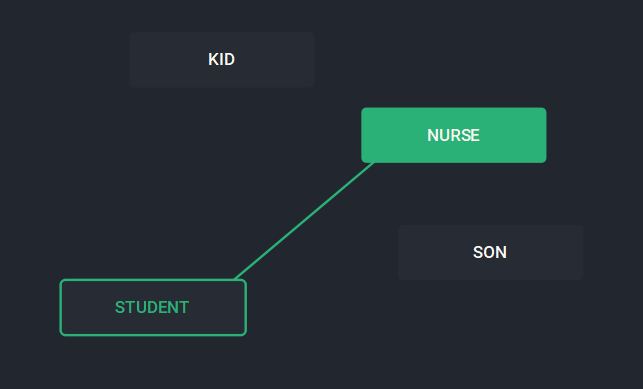
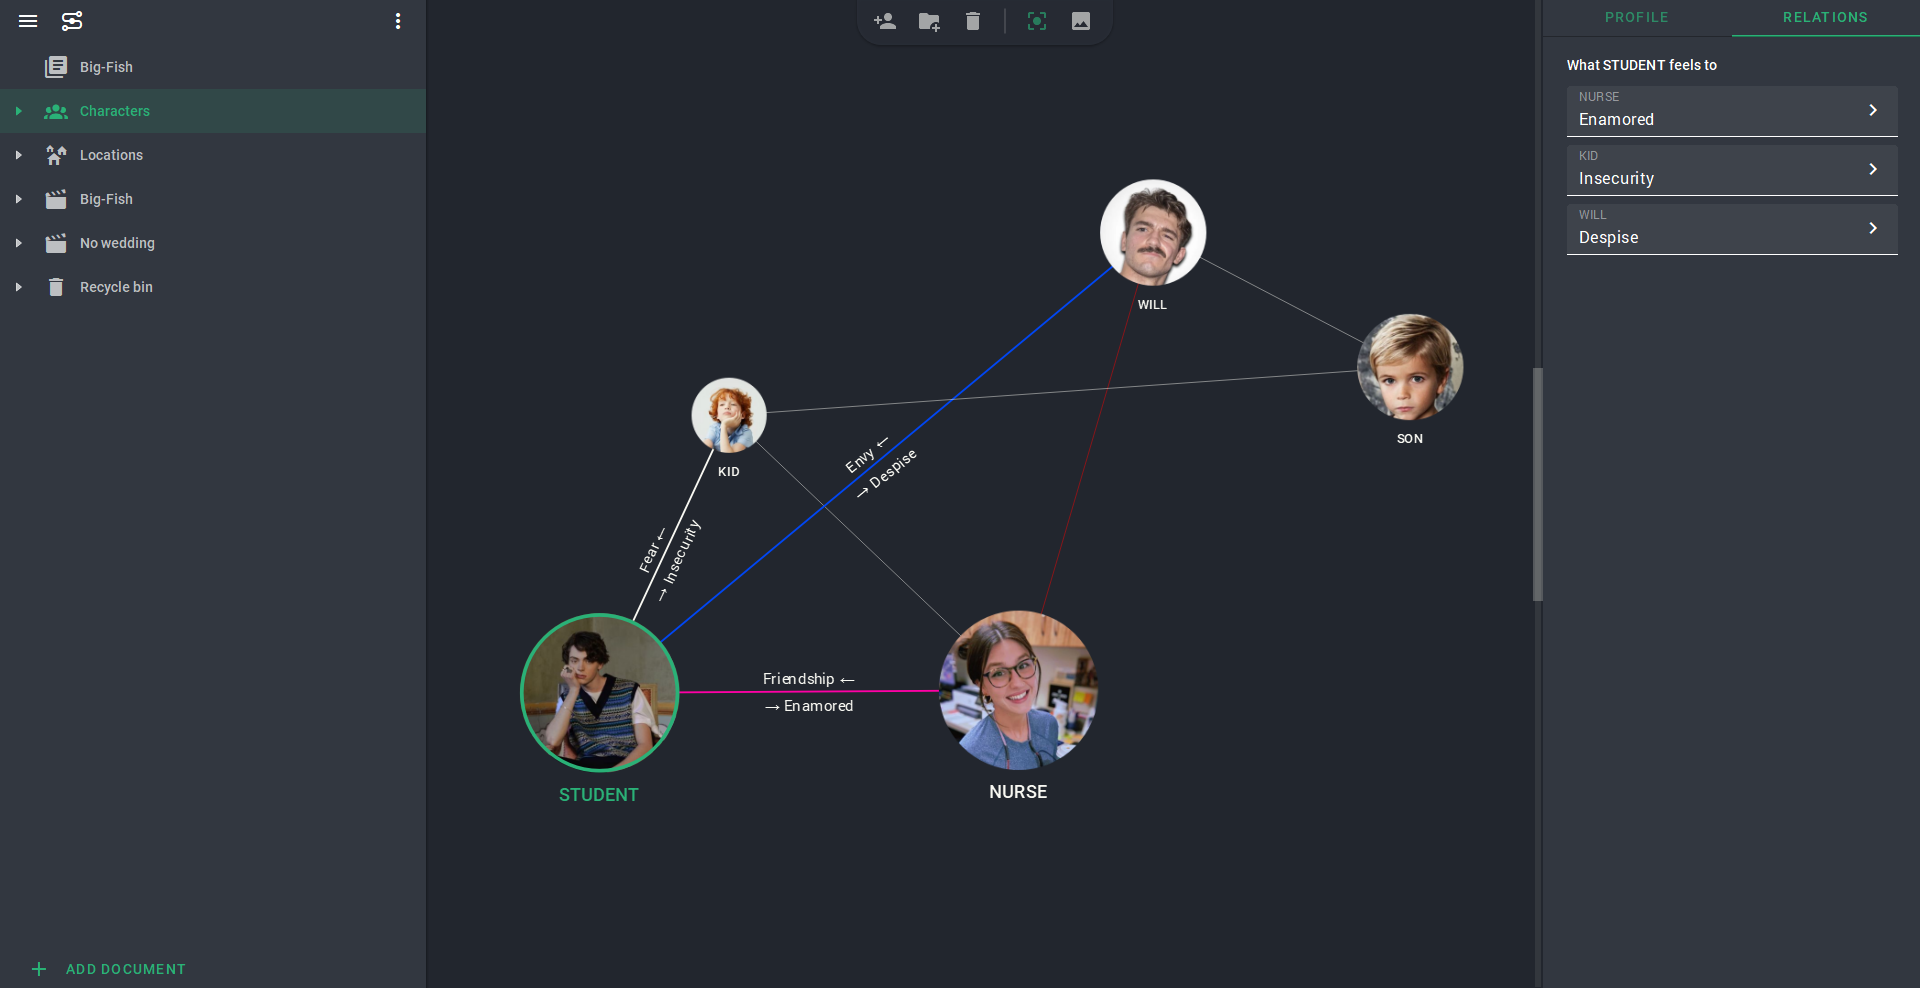
When all the characters are on the field, you can start building connections. To do this, just press Alt and draw a line from one character to another.
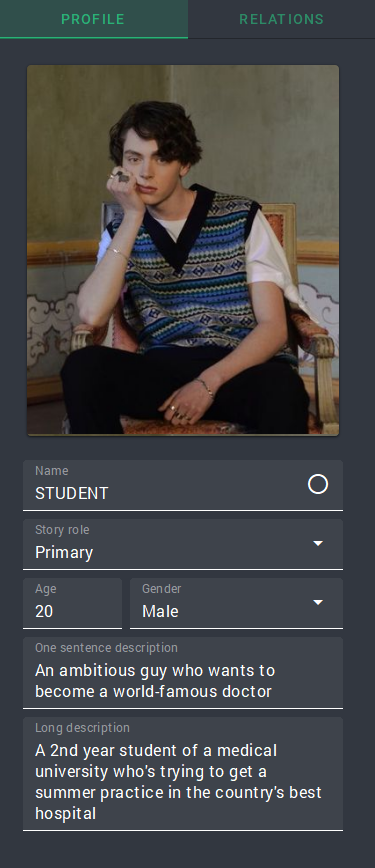
A panel with two sections opens on the right – "Profile", where you can set the character's basic description and a photo (in the extended format, such customization is available in the character's profile, where you can go by clicking on the hero's name in the left panel), and "Relations", where you can sign the main emotion that one character feels for another.

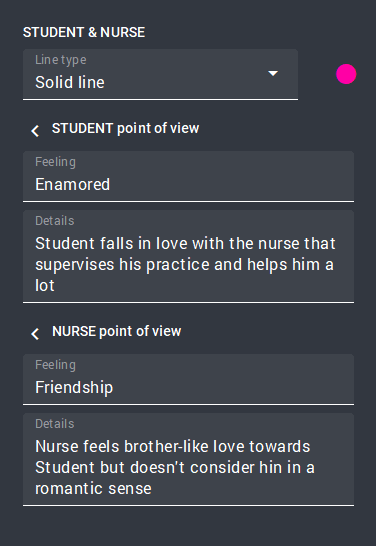
If you click on the arrow at the end of the line in the "Relations" section, you move to a more detailed setting of the relationship, where you can set the viewpoints of both characters, as well as the type and color of the line that connects them. The same panel will open if you click on a relationship line that has already been set.
Once you have customized the relationship of each pair of characters, you get a map showing who is related to whom in your story.

If you want to keep only one character's relationship in focus, click on the focus icon in the top panel and select the character.
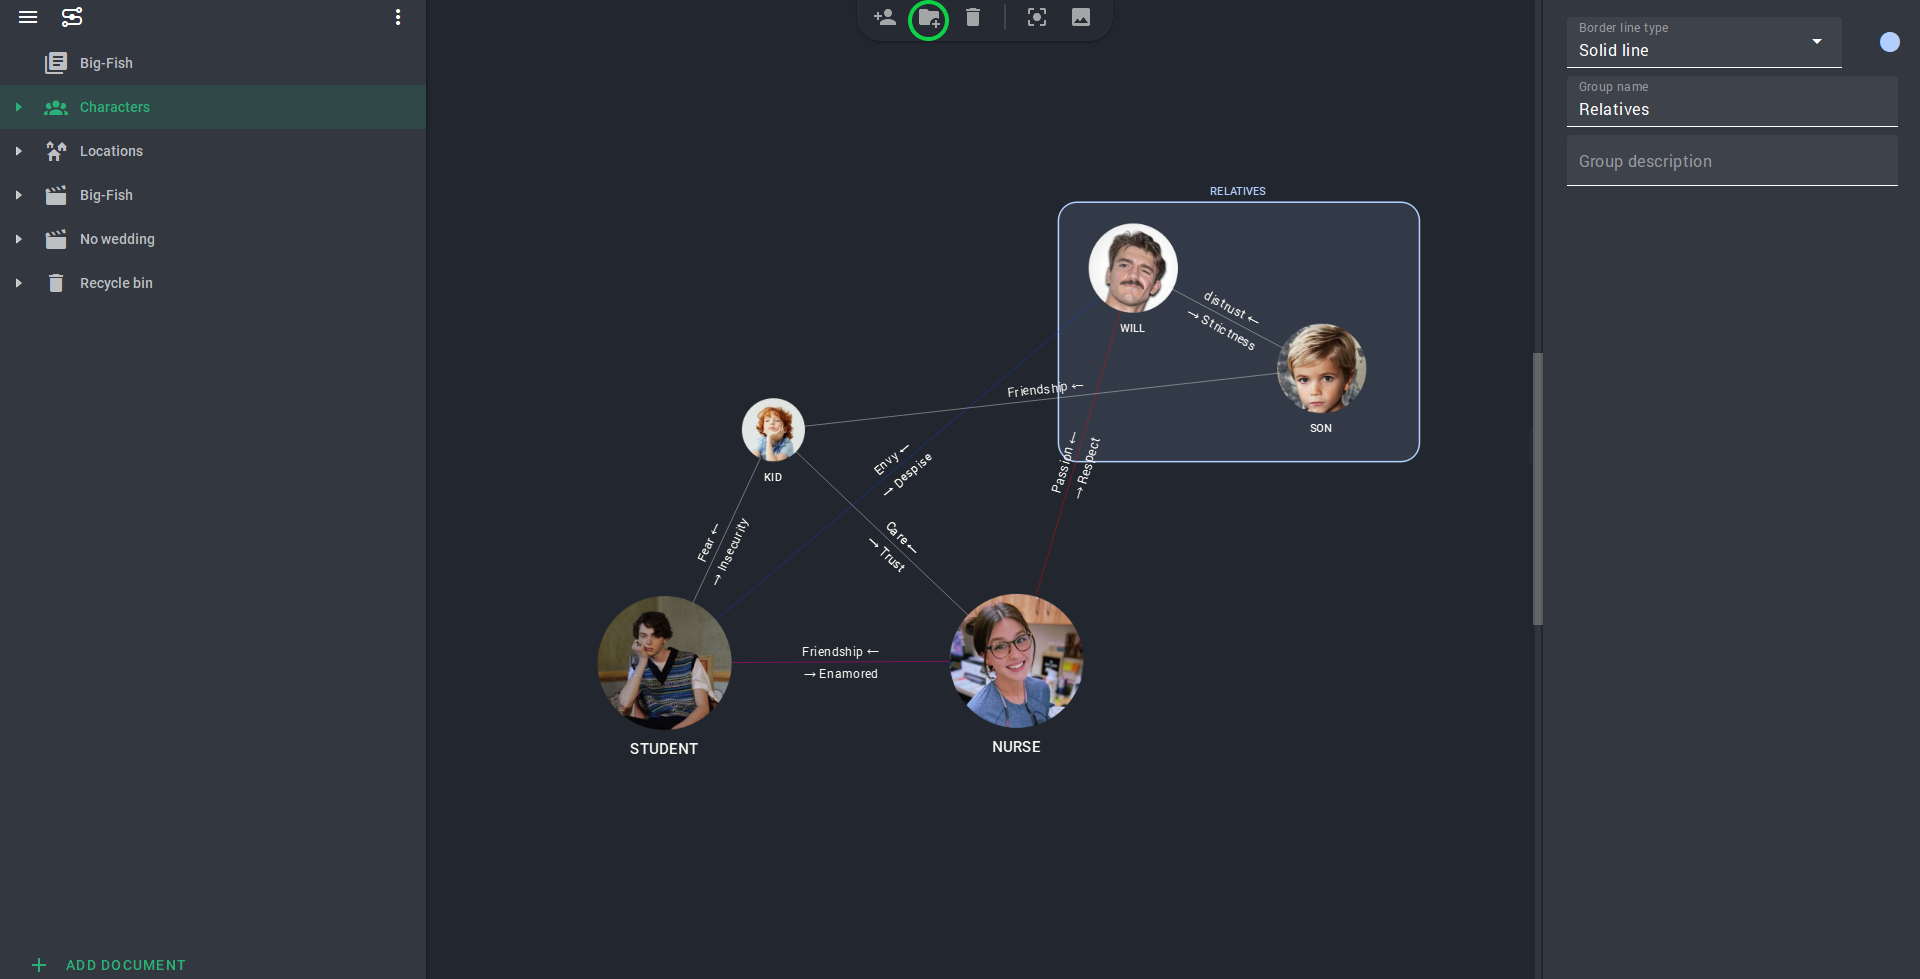
Characters can also be grouped together. To do this, click on the folder icon in the top panel, and then set a name, description, color, and line type for the frame that appears. You can stretch it to the desired size by clicking the mouse and then place the characters there by simply dragging and dropping them inside.
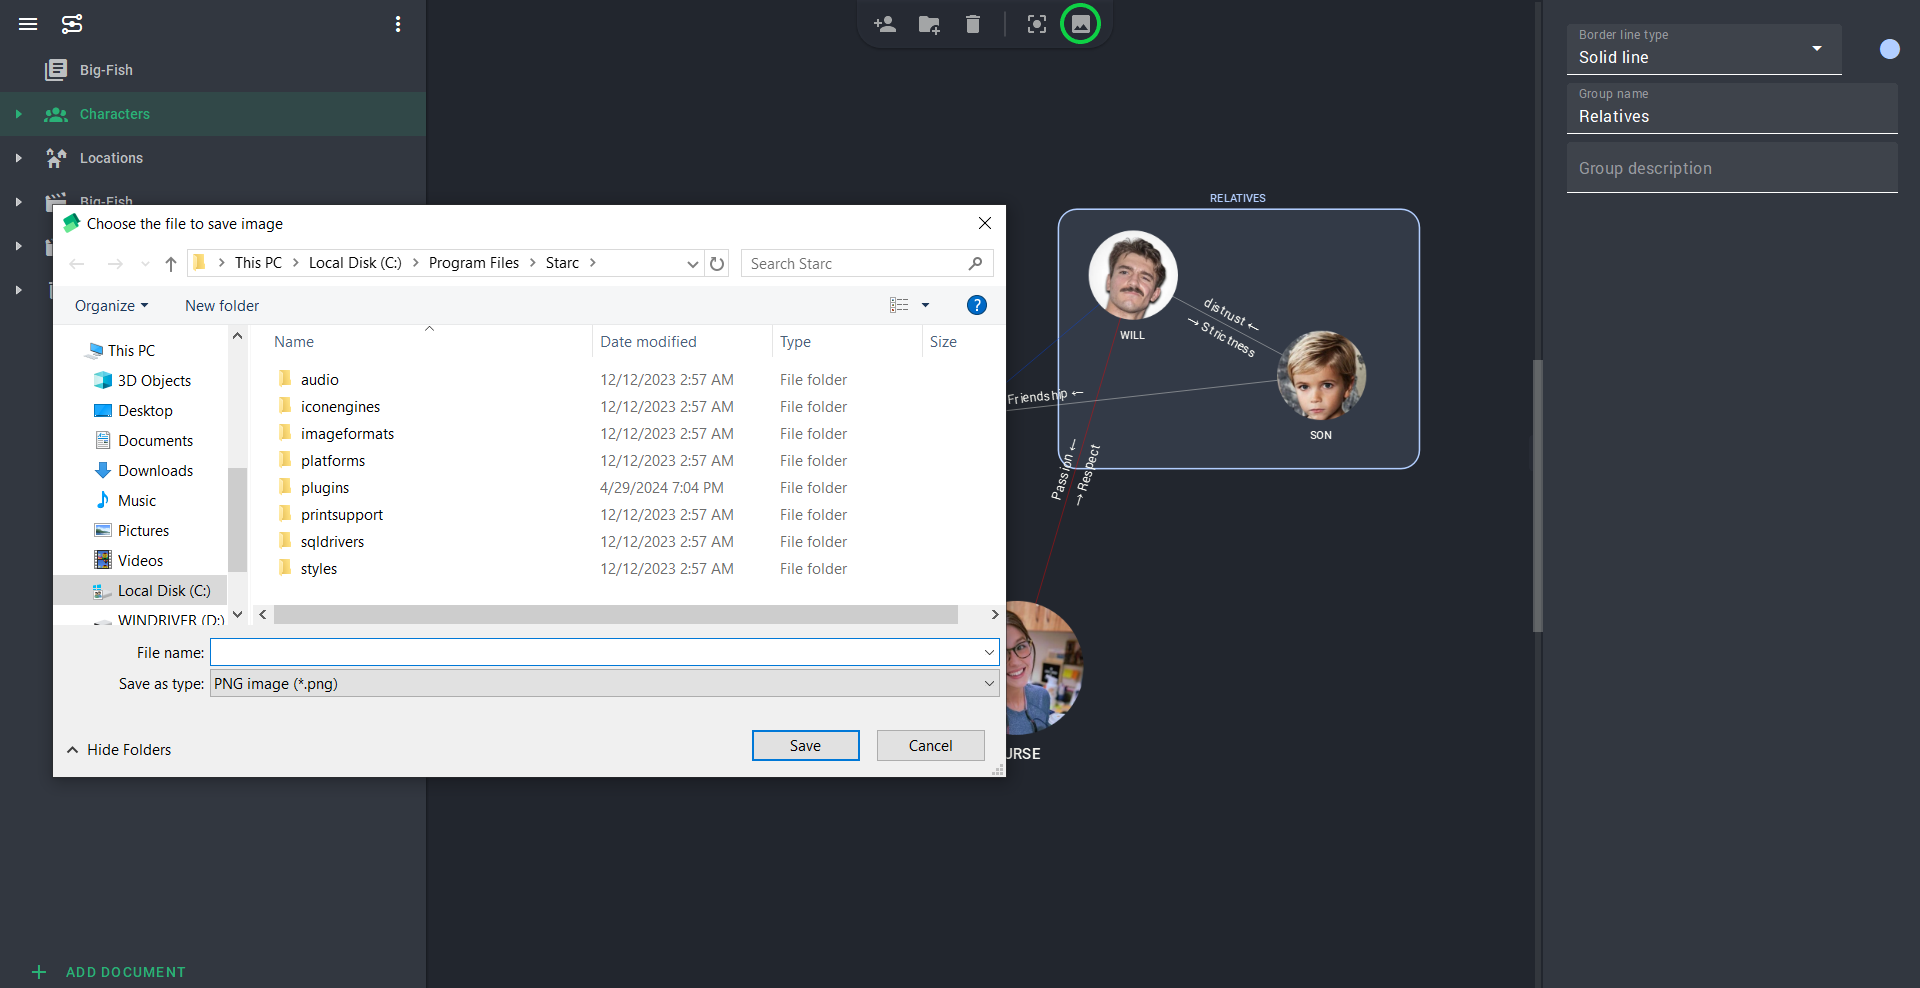
You can save the finished relationship map as a picture, for example, to add it to your pitching presentation. Click on the picture icon at the top and choose the save path.
Use the relationship map to elaborate on the story and better understand your characters. While describing the characters' feelings and emotions for each other, additional fresh ideas may emerge!
Join our community of authors
Download Story Architect and try all features for free. Give us your feedback — let's make the best software for writers together!